The flight controllers PIX6, PIXHAWK,CrossRace Pro, CrossRace, CrossFlight-CE, CrossFlight, Mini Pix how set the camera trigger function?
Note: users need to debug according to the actual servos and camera.
1. Set trigger action in the Mission Planner
Select CONFIG/TUNING—Select Full Parameter List-- Type CAM in the search box
CAM_SERVO_ON and CAM_SERVO_OFF are for adjusting the magnitude of the shutter press through.
CAM_SERVO_ON means the PWM value in microseconds to move the servo to when the shutter is activated.

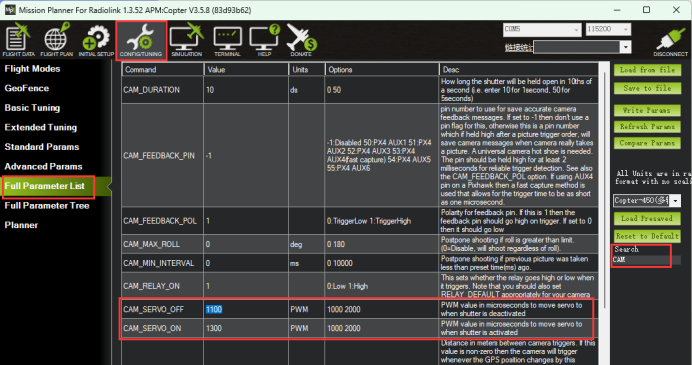
CAM_SERVO_OFF means the PWM value in microseconds to move the servo to when the shutter is deactivated.
CAM_DURATION is for adjusting how long the shutter will be held open, 10ds is 1 second. 50ds is 5 seconds.
Set CAM_TRIGG_TYPE is 0 means the servo will be as the trigger to take a picture, and the value is set 1 means the relay will be as the trigger to take a picture.
CAM_MIN_INTERVAL can set the minimum interval for taking pictures. Postpone shooting if the previous picture was taken less than a preset time ago.
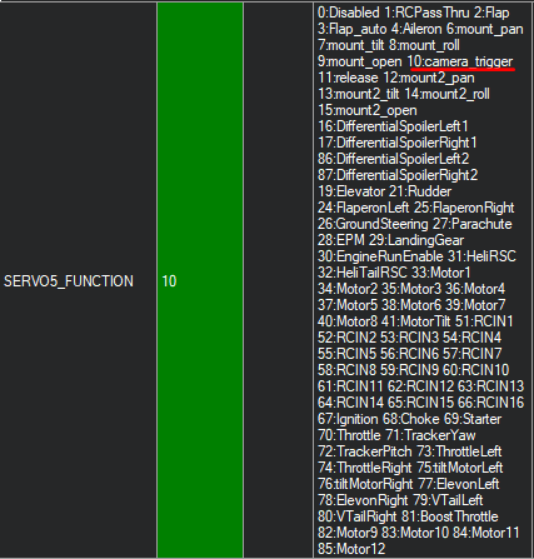
2. Set the camera trigger function control channel.
Set channel 5 as the example:
Select CONFIG/TUNING—Select Full Parameter List-- Type SERVO5 in the search box
Change the value from 0 to 10, which means the camera trigger function has been turned on.

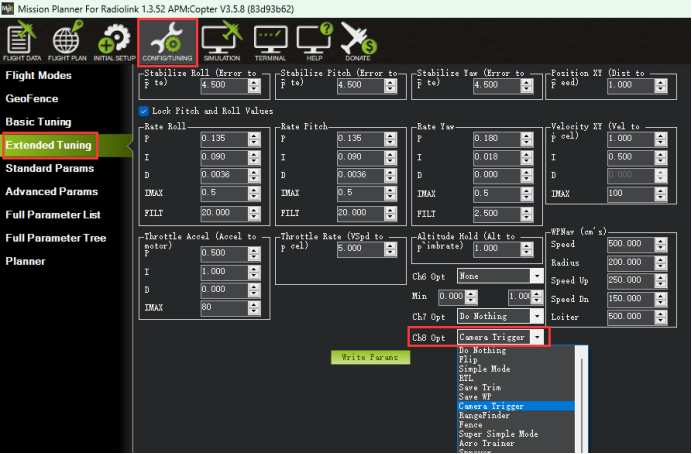
3. Set transmitter action in the Mission Planner
Select CONFIG/TUNING—Select Extended Tuning—Select the Ch8 Opt as Camera Trigger.
And, make sure the CH8 in the transmitter has not been occupied.

More details about CAM_TRIGG can check by clicking the website below: